How do I replace the motors on my CoDrone EDU?
 Updated
by
Leila Firestone
Updated
by
Leila Firestone
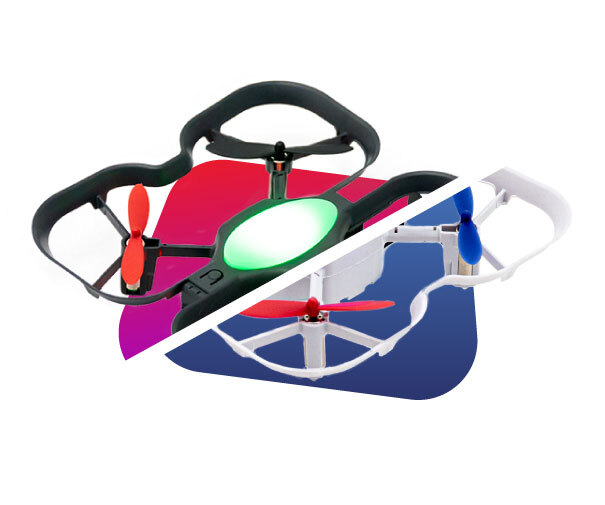
Replacing a motor on your CoDrone EDU is simple with the right tools. Follow the steps below or watch the instructional video to guide you through the process.
What You’ll Need:
- Small Phillips screwdriver (included in your CoDrone EDU kit)
- A replacement motor (make sure the wire colors match the one you are replacing)
- Tweezers (highly recommended for handling small parts)
Motor Replacement Steps:
- Remove the frame
Flip the drone upside down and use the screwdriver to remove the small screws securing the top and bottom halves of the frame. We recommend to do this over a box/bowl so the screws do not fall out and get lost.
NOTE: CoDrone EDU Standard Ed (Black) has 6 screws. CoDrone EDU JROTC ed (white) has 4 screws
- Loosen the motor from the frame
Gently grip the motor shaft and lift slightly to loosen the motor from the frame. We recommend removing the silicone bumpers beforehand to prevent them from falling off or getting lost during the process.
- Disconnect the old motor
Carefully disconnect the motor from the motor connector using either tweezers or your hand to gently pull the motor out.
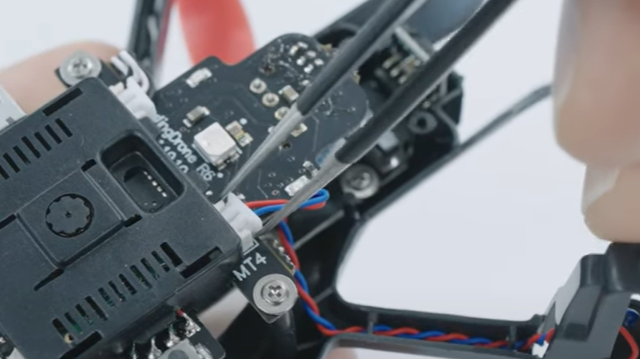
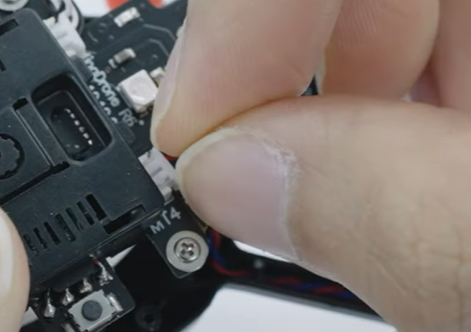
We do not recommend that you pull the motor out by the wires. Please disconnect by gripping the plastic connector.
- Remove the damaged motor
Use your thumbs to gently push the motor all the way out of the motor housing, then carefully thread the motor wires through and out of the motor shaft.
- Insert the new motor
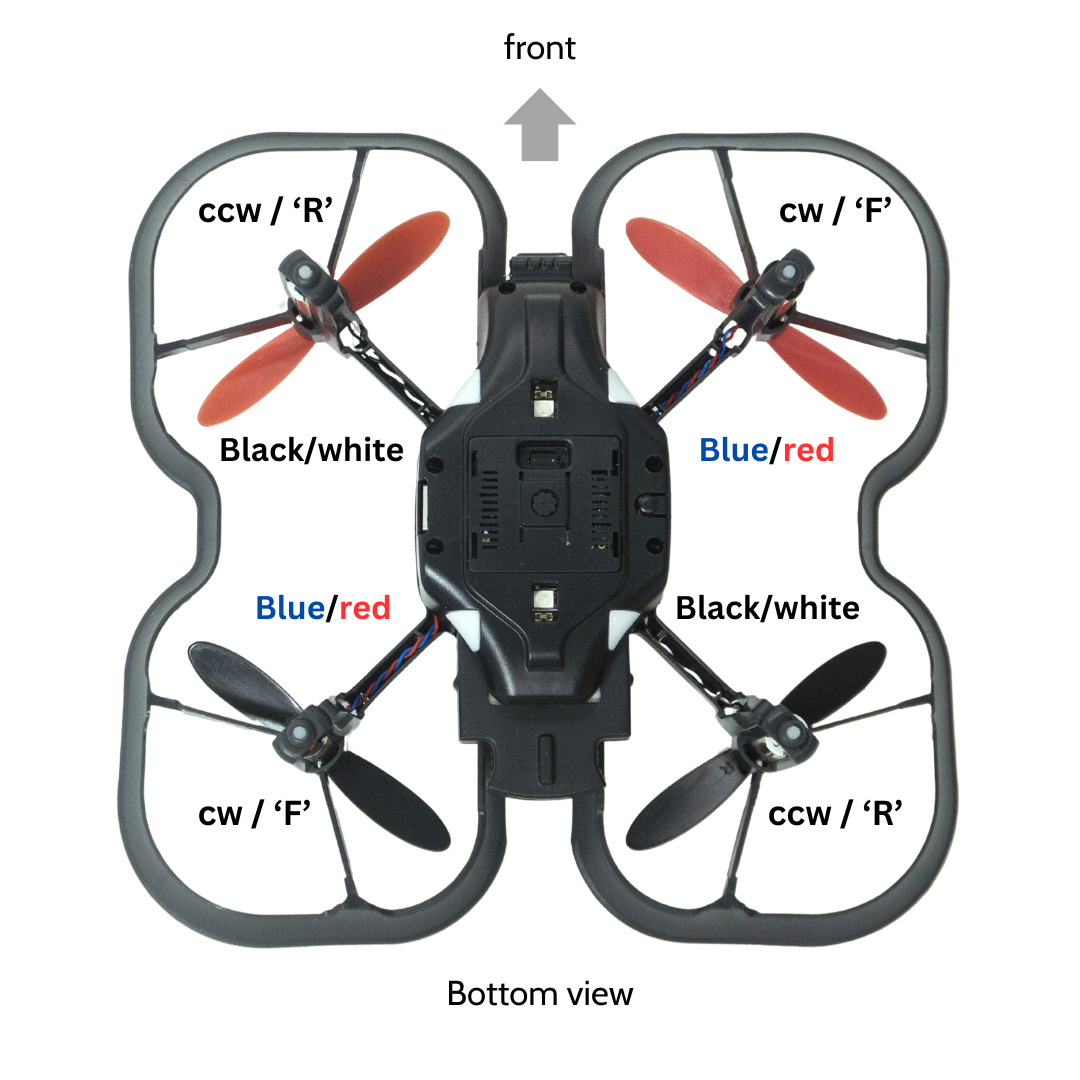
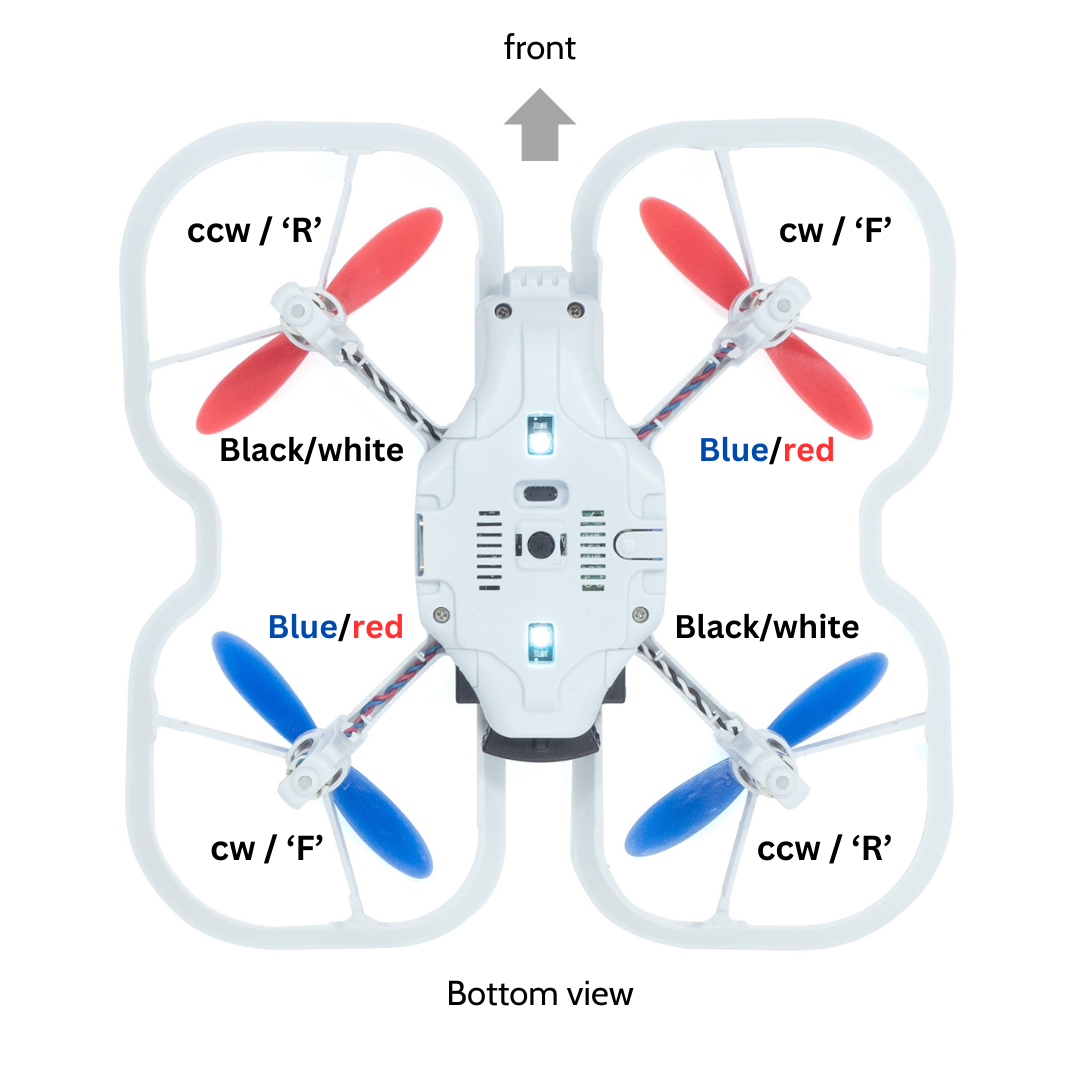
Take your replacement motor (with matching wire colors) and carefully feed the motor and its wires through the motor shaft. Refer to the image below for the correct wire alignment and orientation.
CoDrone EDU | CoDrone EDU (JROTC edition) |
 |  |
- Tuck the wires
Use tweezers or your fingers to neatly tuck the wires into the arm channel to avoid interference during flight.
- Reassemble the drone
Use your screwdriver to re-secure the screws and close the frame.
- Reattach the propeller
If you haven’t already, attach a new propeller with the same orientation as the one you removed. Read our article: How do I replace the propellers on my CoDrone EDU? for help with propeller orientation
